Ubuntu 10.04 Installation

How do I install Ubuntu Lucid Lynx, create a Dual-Boot system and import my files from an existing windows installation? This tutorial tries to focus mainly on beginners who want to try Ubuntu or try to make their first own Ubuntu installation. If you want to know more about partitioning, better look for it somewhere else. Here is the tutorial:

Although it is really simple and should not encounter any problems, a backup before is reccomended.

I start with a 20 GB harddisc running Windows XP.

First we insert a Ubuntu 10.04 CD in our CD-drive and boot the computer from the CD. Depending on the boot-order you might need to press F12 directly after hitting the power button and chose the CD-drive. Ubuntu is then showing itself with the (new) purple splash screen. Do not press any key now, as you would get the mode for installing systems made for sale or to check the memory of your computer.

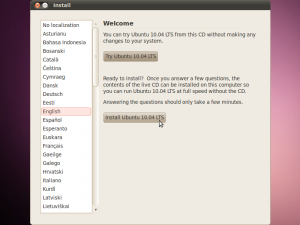
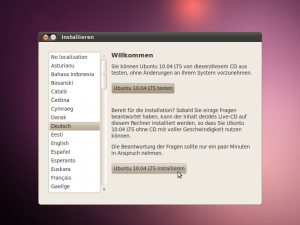
Now you need to set the language for your system. All applications will then (if the language is available for the program) appear in the language you chose. Here you can chose as well if you just want to try the system in Live Mode or to install it directly, as explained here.

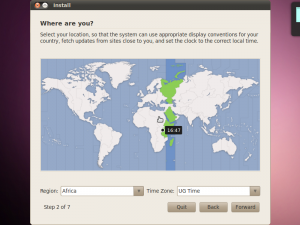
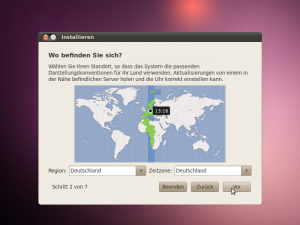
Now we chose our timezone to get the correct timestamp in E-Mails or for Summer/Winter-time to change automatically. Ubuntu tries to guess the right timezone by looking at your language settings and your position if you are already connected to the internet.

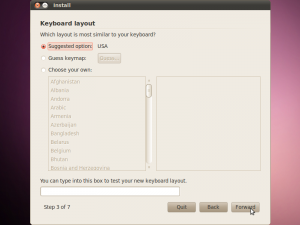
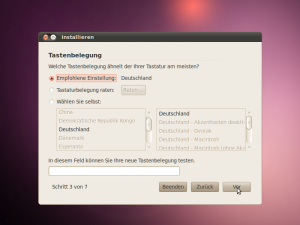
The next step is to select the keyboard layout. As long as you are not using an alternative layout (as I use Neo) or have a keyboard from another country just check, that the suggested option is fitting the contry you are in (If there are no special layouts for your country, you might have a version from the USA).

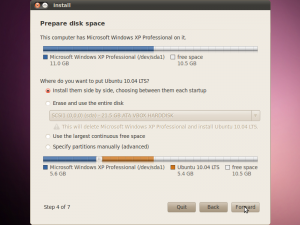
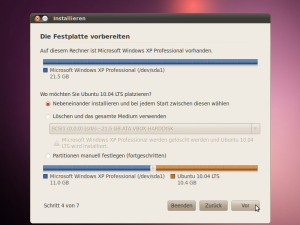
Now we can chose if we want to install Ubuntu next to windows or erase the whole disk if we only want to use Ubuntu. With the bar at the bottom of the page you can chose how much space each operating system gets, if you are installing a dual boot sytem. Experienced users should use the advanced settings to create an own partition for their home folder (like My Documents on Windows), but for a first-time installation this will probably overcharge you. If you are asked to verify your settings, as it will be written to the disk immediately, please read the message (it is really helpful in most cases), check your settings and approve them (or not)

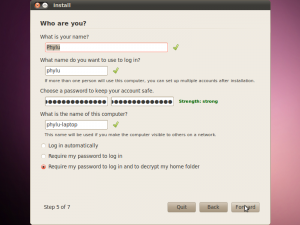
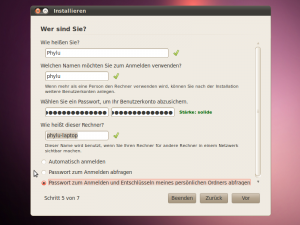
Then your user account needs to be created. Note, that the first account will be a member of the admin group and therefore has the right to install software (after identifying with his password). Other users can be created after the installation. Please chose a long password containing letters, numbers and signs, to make it ungessable. At the bottom you can chose either to get logged in automatically, insert your password to log in and even to encrypt your home folder with your password. For my Ubuntu laptop, this is my preffered option, as nobody, even if it gets lost or is stolen, can access my data. The password needs to be really strong to offer real security here. If you chose this option and forget your password, you will not be able to retrieve your data. So be careful.

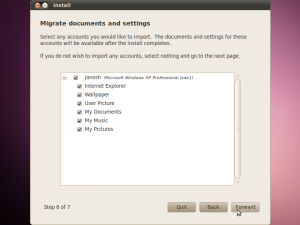
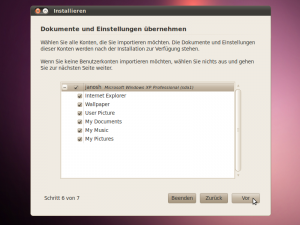
Chose the data to be imported from Windows. This option is only available if you are installing Ubuntu next to an existing Windows version.

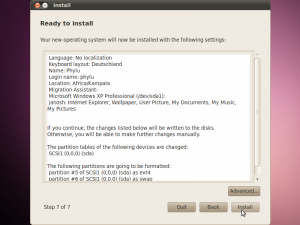
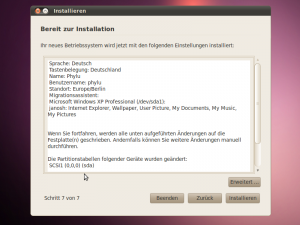
Check everything a last time.

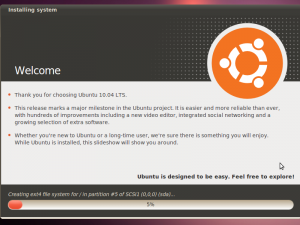
And finally install Ubuntu.

Now restart the computer and remove the CD when you are asked to do so. Congratulations! You have successfully installed Ubuntu.
1 thought on “Ubuntu 10.04 Installation”

Comments are closed.

Ubuntu 10.04 Installation

Wie installiere ich Ubuntu Lucid Lynx, richte mir ein Dual-Boot ein und übertrage meine Daten einer bestehenden Windows Installation? Die Anleitung richtet sich vor allem an Einsteiger, die Ubuntu mal ausprobieren oder ihre erste eigene Installation versuchen wollen. Wer genaueres über die Partitionierung wissen möchte, findet hier nicht, was er will. Hier ist meine Anleitung:

Auch wenn das alles eigentlich sehr einfach ist, und problemlos verläuft, bietet sich eine vorherige Datensicherung an.

Ausgangslage: Eine Festplatte mit 20 GB Speicherplatz auf der Windows XP läuft.

Nun wird eine Ubuntu 10.04 CD in das CD-Laufwerk gelegt und von der CD gestartet. Je nach dem wie die Boot-Reihenfolge eingestellt ist, muss unter Umständen direkt nach dem Einschalten F12 gedrückt und das CD-Laufwerk ausgewählt werden. Ubuntu meldet sich dann mit seinem (neuen) lila Splash-Bildschirm. Es darf nun keine Taste gedrückt werden, da Ubuntu sonst in einen Modus fällt, der für Installationen von Verkaufssystemen oder zum Überprüfen des eigenen Speichers genutzt werden kann.

Der nächste Schritt ist das Auswählen der Sprache. Die gewünschte Sprache wird links in der Leiste ausgewählt. Das ganze System und alle Anwendungen werden, sofern die Sprache vorhanden ist, in dieser erscheinen. Es gibt nun die Möglichkeit Ubuntu als Live-System zu starten oder direkt zu installieren. Ich wähle die Installation.

Als nächstes muss die Zeitzone, in der man sich befindet, ausgewählt werden. Dies ist wichtig, damit die Zeiten zum Beispiel bei E-Mails stimmen und gegebenenfalls Sommer und Winterzeit automatisch umgestellt werden. In vielen Fällen erkennt Ubuntu die richtige Zeitzone schon anhand der Sprache, oder am eigenen Standort bei bestehender Internetverbindung.

Dann wird es etwas technischer. Es muss das Layout der Tastatur gewählt werden. Im Normalfall reicht es hier aus, zu überprüfen, ob bei der empfohlenen Standardeinstellung das eigene Land steht, und dann auf „Vor“ zu klicken. Wenn man ein alternatives Layout (so wie ich Neo) nutzen will, oder an einer amerikanischen Tastatur arbeitet, das System aber auf Deutsch gestellt hat, kann man dies hier festlegen.

Nun wird ausgewählt, ob man Ubuntu zusätzlich zu Windows installieren möchte, oder die komplette Festplatte für Ubuntu verwenden (und Windows löschen) möchte. Bei einer so genannten Dual-Boot Installation kann beim Hochfahren des Rechners ausgewählt werden, welches Betriebssystem starten soll. Der Regler (unten im Bild) lässt einen Anpassen, wie viel Speicherplatz welchem System zur Verfügung stehen soll. Erfahrenere Nutzer sollten unbedingt die manuelle Partitionierung wählen, um eine vom Betriebssystem getrennte Partition für ihre Daten zu erstellen. Bei der ersten (oder auch zweiten) Installation von Ubuntu kann man damit aber leicht überfordert werden. Eine eventuelle Meldung, dass die Änderungen erst geschrieben werden müssen bevor es weiter geht, sollte man sich gut durchlesen, und erst nach einer Versicherung, dass alles passt, bestätigen.

Im nächsten Schritt wird das eigene Benutzerkonto angelegt. Der hier angelegte Benutzer wird der Gruppe „Admin“ hinzugefügt, und kann später (nach der Bestätigung mit seinem Passwort) Programme installieren. Weitere Benutzer können, wenn das System installiert ist, angelegt werden. Das Passwort sollte möglichst lang sein, Buchstaben, Zahlen und Sonderzeichen enthalten, und damit schwer zu knacken sein. Die letzte Option auf dieser Seite lässt einstellen, ob man automatisch angemeldet werden soll, das Passwort zum Anmelden benötigt wird, oder zusätzlich noch der eigene Home-Ordner (vergleichbar mit den Eigenen Dateien in Windows) verschlüsselt werden soll. Ich bevorzuge diese Option, falls ich meinen Laptop verlieren sollte oder er geklaut wird, ist es ohne das Passwort (ein entsprechend starkes vorausgesetzt) fast unmöglich die Dateien zu entschlüsseln. Das bedeutet allerdings auch, dass die eigenen Daten, wenn man sein Passwort vergisst, unwiederbringlich verloren sind.

Es muss nur noch festgelegt werden, welche Daten von Windows importiert werden sollen. Dies ist nur möglich, wenn man Ubuntu neben Windows installiert. Falls Ubuntu die ganze Platte belegen soll, empfiehlt es sich Daten, die man behalten möchte vorher zu sichern, und nach der Ubuntu Installation wieder auf den Computer kopieren.

Zuletzt werden alle Einstellungen noch einmal zur Überprüfung angezeigt. Ein Klick auf Installieren startet dann den Installationsprozess.

Ubuntu wird jetzt installiert.

Jetzt muss der Computer nur noch neu gestartet und, nach Aufforderung, die CD entfernt werden. Schon ist das selbst installiertes Ubuntu fertig.